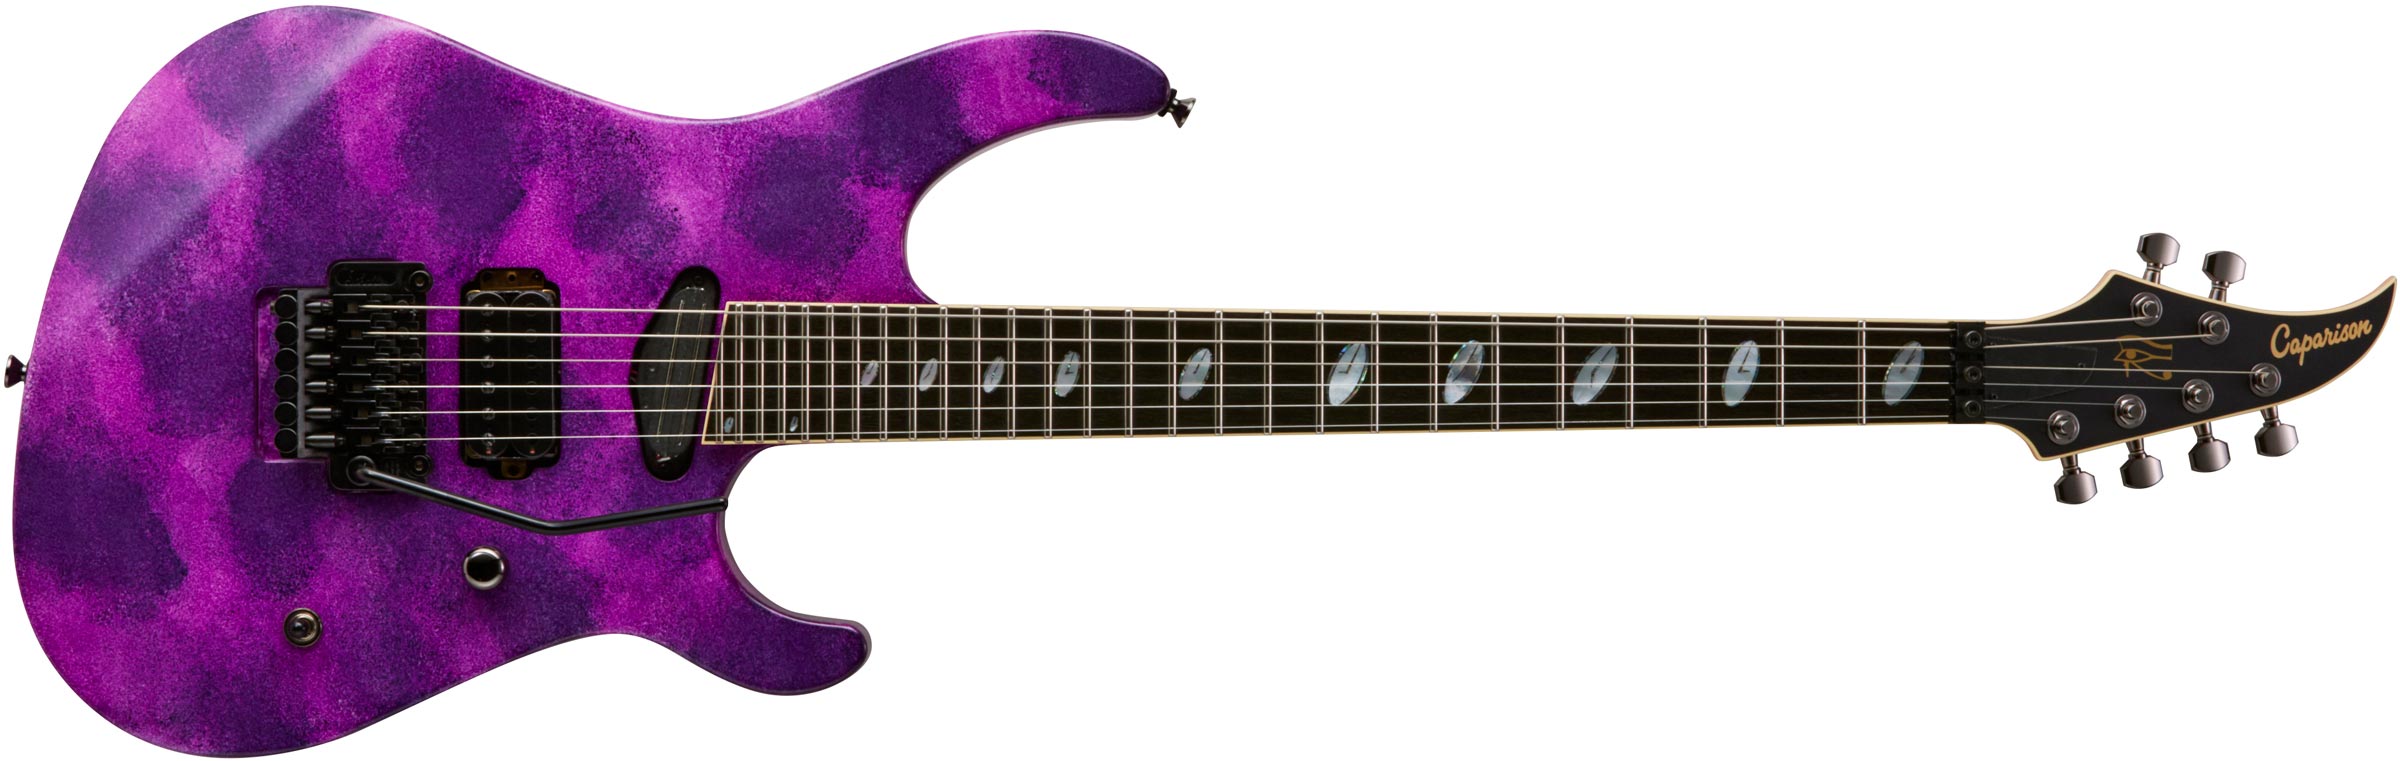
Page 1 of 3 123 LastLast
Results 1 to 10 of 28

Thread: How To: Install EMGs in a Horus [WARNING: LOTS OF PICS]

  1. #1
    Join Date
    May 2007
    Location
    Toronto, Ont - CANADA
    Posts
    2,346

    How To: Install EMGs in a Horus [WARNING: LOTS OF PICS]

    Seeing that my client who purchased the Horus Black Night I had requested to have the pickups changed to EMGs with the 18v mod (EMG85+SA), I've taken loads of pictures of the whole process and will be putting up a Pictorial of the whole process from beginning to end. Everything will be posted up later today when I'm done working on the guitar. If there's any specific issues anyone wants me to tackle for them please let me know. Usually the biggest problem is wiring the switch and wiring the battery clip on a Horus using the stock parts. Anyways, stay tuned!!
    Last edited by buddroyce; 03-08-2008 at 08:19 AM.
    ---=== Founder - CaparisonForum.Com ===---
    Got a Caparison question? Just ask

  2. #2
    Join Date
    May 2007
    Location
    Toronto, Ont - CANADA
    Posts
    2,346
    WHOA... I just realized I have a total of 31 pics for this tutorial/pictorial. Do you guys want me to post all the pics now as a pictorial and I'll do the actual Howto/Tutorial later?
    ---=== Founder - CaparisonForum.Com ===---
    Got a Caparison question? Just ask

  3. #3
    SymphonyZ Guest
    Post All The Pics Now!! Do The Tut Later!!!

  4. #4
    whorus Guest
    ^ i 2nd that

  5. #5
    Join Date
    May 2007
    Location
    Toronto, Ont - CANADA
    Posts
    2,346
    Ok... here's all the pics that I've uploaded to Google Picasa if anyone wants to skip ahead and see all the pics.

    http://picasaweb.google.com/buddroyc...tEMGInstall18v

    and here's the first set of 4 pics


    A *BRAND NEW* Caparison Horus Black Night with the stock pickups Pre Operation. (strings removed already.. I'm assuming you know how to do that)


    The BACK of this brand new Caparison Horus


    Shot of the wiring cavity with everything still neatly in place. As you can see, other than the push-push switch the only other thing in there is a ground clip screwed to the side of the cavity (that's where all the ground wires get soldered to)


    The output jack. Probably your biggest wiring nightmare trying to get to that unused lug (it's on the left in this image). I've pushed the lug out a little bit to make the wiring part easier. If you're going to do the same, please be careful. Break it and you're screwed.
    Last edited by buddroyce; 08-01-2009 at 01:27 AM.
    ---=== Founder - CaparisonForum.Com ===---
    Got a Caparison question? Just ask

  6. #6
    Join Date
    May 2007
    Location
    Toronto, Ont - CANADA
    Posts
    2,346
    next 4

    To make life easier, instead of trying to wire the pickups with the switch still in the cavity I'm going to remove the pot.


    Here stands a lone volume knob. Unbeknownst to it, it will soon be attacked by a small flat head screw driver severing it from the shaft.


    The shaft with the knob removed. It's stands alone pretty naked here..


    The volume pot being removed using my handy ESP Multi-Spanner tool, got it from the boys at the ESP Custom shop, very handy tool. In the VERY likely instance that you don't have a tool like this, you can get away using a pair of pliers or a hex driver, just be careful not to scratch the finish(something the ESP tool allows me not to worry about)


    The volume control/push-push switch removed.
    Last edited by buddroyce; 08-01-2009 at 01:27 AM.
    ---=== Founder - CaparisonForum.Com ===---
    Got a Caparison question? Just ask

  7. #7
    Join Date
    May 2007
    Location
    Toronto, Ont - CANADA
    Posts
    2,346
    4 more


    Close up of the push-push switch. Only one side of this switch is being used. Not much you can use the 2nd half for. Maybe if you were using a true single coil you could add another 500k resistor to drop the resistance of the pot to 250k. The good news is because we're only using one side, if you break a pin on one side you can still use the other.

    NOTE: It's not shown on the pictures but you'd also want to add a 27k resistor across the input and groud lugs (the two outer ones). That will drop the resistance down to 25k. Without the resistor, your volume is pretty much an on/off switch and may sound a little bright.


    Close up of the ground clip that's screwed into the side of the wiring control cavity.


    TIP: Use another screw into the middle screw hole of the bass side of the stock BHIIR to get a perfectly aligned hole for the EMG (keeps you from needing to drill another hole or guess it).

    I removed the screw from the other end of the BHII-R and just screwed it into the center hole on the fat side. This lines it up perfectly. You can do this when you're installing other brands of pickups.


    New center hole to install the EMG in.
    Last edited by buddroyce; 15-10-2012 at 02:06 PM.
    ---=== Founder - CaparisonForum.Com ===---
    Got a Caparison question? Just ask

  8. #8
    Join Date
    May 2007
    Location
    Toronto, Ont - CANADA
    Posts
    2,346
    Brace yoursef for more pics


    neck pickup with some black tape to better hide the wires


    Here's how the pickup looks. You can see the tape very clearly here, but without the flash you can't see the wires unless you look very carefully. It only takes a little more effort to make your wiring install look nice.


    Prevent wiring frustrations, always label your wires.
    Last edited by buddroyce; 08-01-2009 at 01:28 AM.
    ---=== Founder - CaparisonForum.Com ===---
    Got a Caparison question? Just ask

  9. #9
    Join Date
    May 2007
    Location
    Toronto, Ont - CANADA
    Posts
    2,346

    Stock Caparison pickup screws through the EMG 85


    Screw through the EMG 85 angle two


    EMG 85 nicely installed. By using the hole we made earlier with the screw through the center hole in the BHII-R, you'll notice how nicely the pickup sits right in the middle.
    Last edited by buddroyce; 08-01-2009 at 01:29 AM.
    ---=== Founder - CaparisonForum.Com ===---
    Got a Caparison question? Just ask

  10. #10
    Join Date
    May 2007
    Location
    Toronto, Ont - CANADA
    Posts
    2,346

    Close up of the pickup screwed into the new hole. You can see the two original holes from the BHII-R there. I honestly don't know why some guys actually go through all the trouble and swap base plates on pickups to fit them in a Horus.


    The illustrious Horus PUSH-PUSH switch. This is a VERY small switch and the contacts are MUCH smaller than your normal push/pull switch. It's a 500k DPDT push/push switch that's available at Allparts should you screw up the switch badly.

    Although you could wire the guitar with the switch in the body, it's MUCH easier to take the switch out and then wire the guitar. Just unsolder the top and the bottom wires. The lug on the top (closest to the pot) is the neck pickup and the bottom one(furthest away from the pot) is the bridge pickup


    Here's the switch as well as the ground clip that's screwed to the body cavity (great idea IMO as it grounds the actual cavity as well). Unscrew this clip out of the cavity to make unsoldering and soldering the old and new ground wires much easier.


    Once everything is solder, time to put the switch back in. I'm using my handy ESP Multi-spanner tool (one of the best damn investments I've ever done)
    Last edited by buddroyce; 08-01-2009 at 01:29 AM.
    ---=== Founder - CaparisonForum.Com ===---
    Got a Caparison question? Just ask

Tags for this Thread

Posting Permissions

  • You may not post new threads
  • You may not post replies
  • You may not post attachments
  • You may not edit your posts
  •